Operation Parameters
After the selection of the different contours it is time to enter the parameters. Press the parameters button and the parameters dialog will open.
Now fill out the different dialog pages with the values shown below.
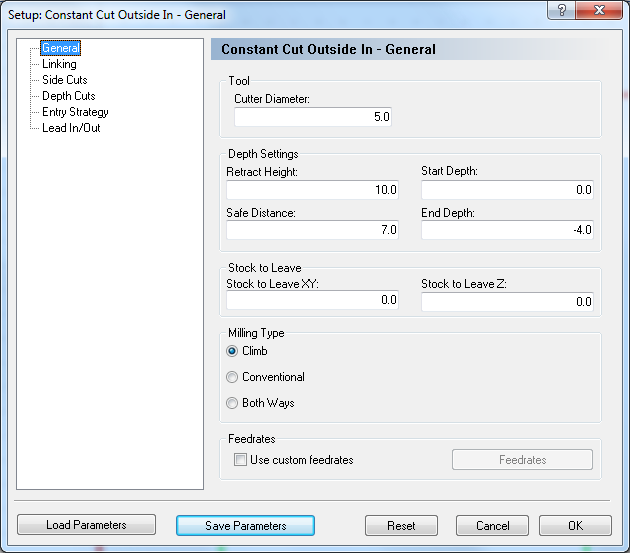
- Cutter Diameter: The diameter of the used tool.
- Retract Height: The height to which the tool will move between contours, and where it will stop at the end of the operation.
- Safe Distance: The distance above the part, where the feedrate will change from rapid to cutting speed.
- Start Depth: This is the top of the stock.
- End Depth: The depth at which the last cut will be taken. This value is corrected by the Stock to Leave Z value.
- Stock to Leave XY: The amount of stock that is left in the XY/side direction at the end of the operation (after both Roughing and Finishing).
- Stock to Leave Z: The amount of stock that is left in the Z/depth direction at the end of the operation (after both Roughing and Finishing).
- Climb: When checked, the operation will be generated using climb milling.
- Conventional: When checked, the operation will be generated using conventional milling.
- Both Ways: When checked, the operation will be generated using with toolpaths that goes both forth and back so they will shift between climb and conventional milling.
- Use custom feedrates: Check this option to enable using custom feedrates for the milling operation.
- Feedrates: Click this button to open a new window to enter custom values for Cutting (XY), Helix/Ramp, and Plunging (Z) feedrates.
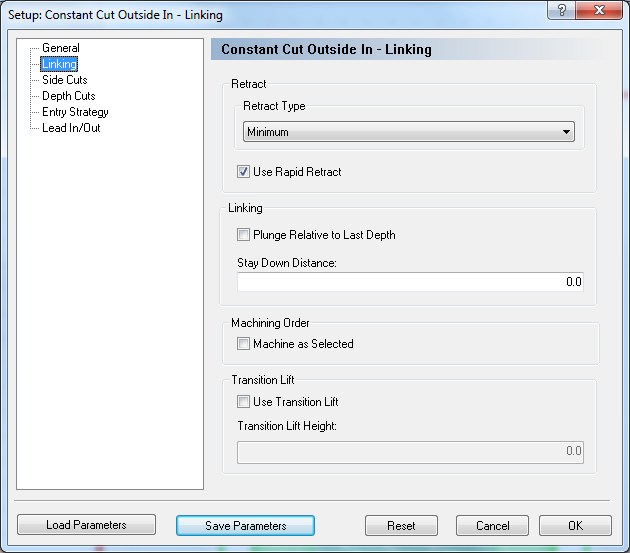
- Retract Type: This defines the height to which the retract move is made. If Full is selected the this height is the defined retract height. With Minimum selected the operation uses the defined Safe Distance as retract height.
- Use Rapid Retract If this option is checked all retract moves will be performed as Rapid moves.
- Plunge Relative to Last Depth Normally he transition from rapid to feed takes place at the safe distance above the part, but with this option selected this transition height moves down with the last cutting depth. Used correctly this can make huge improvements in the performance of the operation.
- Stay Down Distance Normally the tool will retract every time linking move is made. With the stay down distance set to a value different than zero, no linking move will be made if the end point of the current cut and the start point of the next is closer than the defined stay down distance.
- Machine as Selected This is only used if multiple contours are milled in the same operation. when multiple contours are milled together then CNC-Calc will try to optimize the order in which they are machined in order to achieve the best performance. Sometimes there exist constraints that prevents this optimisation and makes it necessary to machine them in a special order. By selecting Machine as Selected no optimisation will be performed. and the contours will be machined in the order that the user selected them.
- Use Transition Lift When this option is checked transition lifts will be used when possible. Transition lifts are only used when the distance between the current endpoint of the cutting move and the start of the next cutting move is less than the stay down distance.
- Transition Height This is the height of the transition lift. If it is set to zero the tool will stay down at the cutting depth and move to the start of the next cutting move.
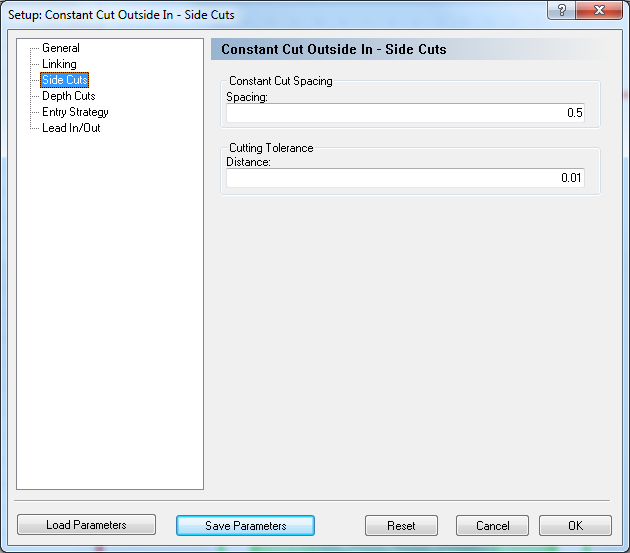
- Spacing: This is the distance between the cuts in the XY direction.
- Cutting tolerance: When the toolpath is generated this tolerance is used in the calculation and the error between the original contours and the toolpaths will be smaller than this distance.
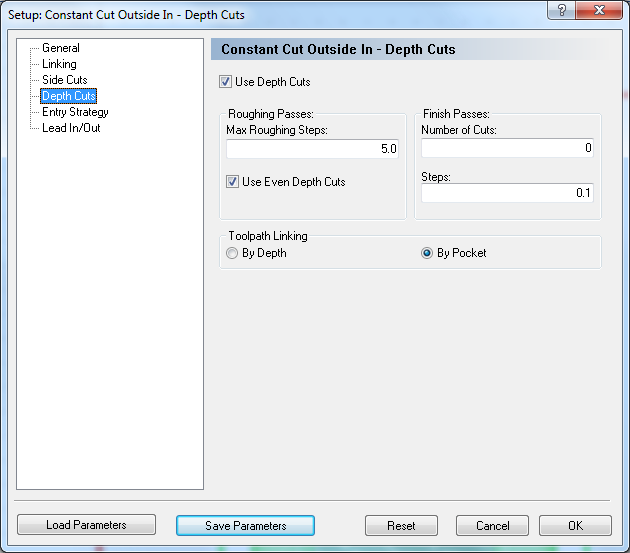
- Use Depth Cuts: If this option is checked, the operation will perform the cuts defined by the parameters. Otherwise, only one cut at the final depth will be performed.
- Max Roughing Steps: The maximum cut that will be taken in a roughing cut.
- Use Even Depth Cuts: If this option is checked, all the roughing passes will have the same distance. If it is left unchecked, cuts will be taken at the Max Roughing Steps distance, and any rest material will be taken with the last cut.
- Number of Cuts: The number of finishing depth cuts in the operation.
- Steps: The distance of each finishing pass.
- By Depth: This is only used if multiple pockets are milled in the same operation. If selected, the cut on each depth will be performed on all pockets before any cuts are made at a new depth.
- By Pocket: If selected, one Pocket will be milled from start to finish before the next pocket is worked upon.
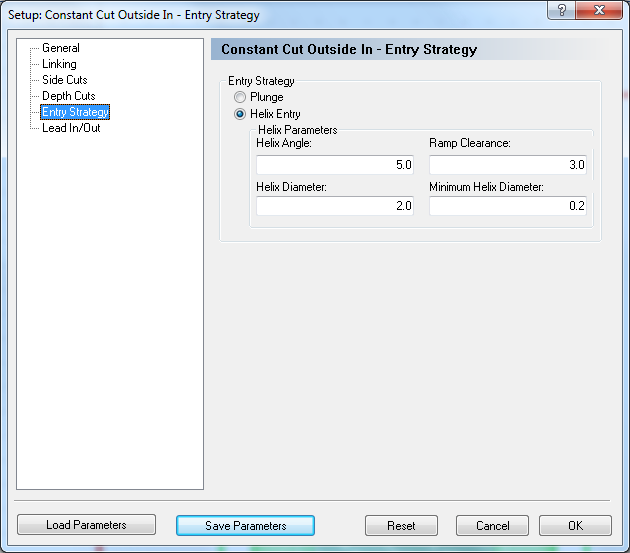
- Plunge: When this is selected, the tool will move straight down.
- Helix Entry: Moves down to Helix Clearance above the part. Then it will spiral down with the angle Helix Angle in a circular movement with a diameter between Helix Diameter and Minimum Helix Diameter. How big the actual diameter will be depends on the geometry.
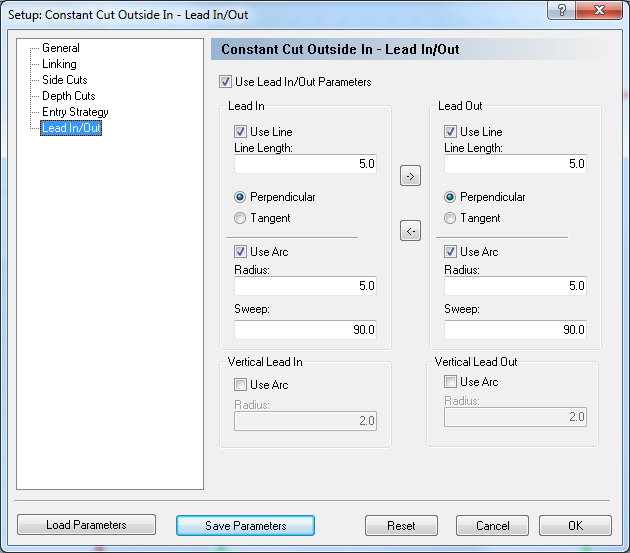
- Use Lead In/Out Parameters: Enables or disables the lead in and out.
- Use Line: Enables or disables the lead in/out lines.
- Line Length: The length of the lead in/out line.
- Perpendicular: If this option is selected, the line will be perpendicular to the following element for lead in, and the previous element for lead out.
- Tangent: If this is selected, the line will be tangent to the following element for lead in, and the previous element for lead out.
- Use Arc: Enables or disables the lead in/out arcs.
- Radius: The radius of the lead in/out arc.
- Sweep: The sweep angle of the lead in/out arc.
- The two arrows in the middle of the dialog are used to copy all values from lead in to lead out, and vice versa.
Press the Ok button to close the dialog and save the parameters.
With all the parameters entered we can generate the toolpath and work with this in the editor.